|
VRC Documentation
Installing or Upgrading VRC
Requirements
VRC has the following hardware & software requirements:
- Windows 2000 or Windows XP (Other Windows versions are untested)
- Video card with OpenGL support with current drivers
- Any Windows-supported sound card with current drivers
- Internet connection with reasonable latency (modem is sufficient)
- Headset/speakers & microphone if using voice
VRC makes use of the following network ports:
| Port | Protocol | Data Type | Notes |
| 6809 | TCP | Aircraft position updates and general network data | Outgoing - generally no forwarding needed. |
| 3782 | TCP | Voice communications | Outgoing - generally no forwarding needed. |
| 3290 | UDP | Voice communications | MUST be forwarded through your router! |
Note that only port 3290 UDP must be forwarded through your router for incoming connections. The other two ports are for outgoing connections only.
Installing for the first time
After downloading VRC, you will have a file named "VRCInstaller.exe" or perhaps just "VRCInstaller" depending on your Windows Explorer settings. Run this program to start the VRC installation. You will be prompted to accept the VRC End-User License Agreement before you can continue the installation. After accepting the EULA, you will be given some options to how VRC is installed:
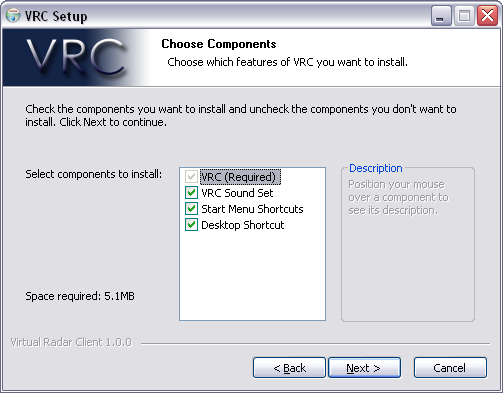
The first option is obviously required and cannot be unchecked. That option simply installs the main VRC executable file.
If you select the second option, "VRC Sound Set", then a set of default sound files will be installed in a "Sounds" folder within your "My Documents\VRC" folder. These sounds will also be configured automatically within the "Default" profile. (See "The Profile System") You can always change the sounds later if you wish.
The last two options allow you to choose whether or not you want the installer to create a shortcut on your desktop and/or in your Start Menu under "All Programs".
The next screen allows you to choose the folder where you wish to install VRC:
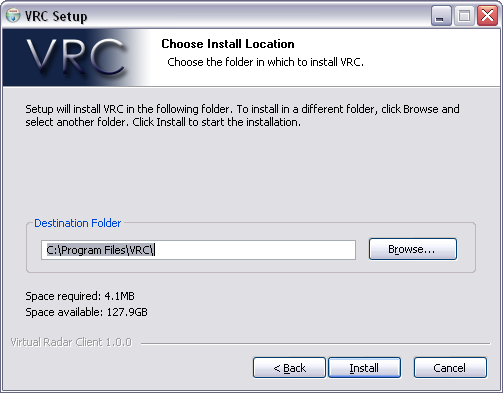
Simply type the location you want to use, or click the "Browse..." button and select a folder on your hard drive. After choosing the installation folder, press the "Install" button and VRC will be installed.
Upgrading to a new version
Upgrading VRC is essentially the same as installing. There is no need to uninstall VRC first. Simply download the installer for the latest version and run it. It will overwrite the existing version, while keeping your configuration intact. (It will not overwrite an existing VRC.ini file, which is where your profiles are stored.)
When upgrading to version 1.2, your INI file will undergo a conversion process the first time you run version 1.2. Starting with version 1.2, all color selections are stored in Color Profiles which are new bracketed sections in the INI file. Color profiles based on your existing color selections will be created when you first run version 1.2.
Uninstalling
There are two ways to uninstall VRC. Assuming you allowed the installer to create Start Menu shortcuts, you will find an Uninstall option in the VRC folder in your Programs Menu. The other method is to access the "Add or Remove Programs" option from your Windows Control Panel. Select the VRC entry from the list and press the "Remove" button.
The following actions are taken when the VRC uninstaller is run:
- The VRC.exe file is deleted.
- Support files are deleted from the folder where you installed VRC. These files include uninstaller.exe, servers.txt, VRC_EULA.txt, and VRC_sector_parse_results.txt.
- The Start Menu and Desktop shortcuts (if any) are removed.
- VRC is removed from your "Add or Remove Programs" list.
Note that your VRC.ini file (where all your profiles are stored) is not deleted. It will remain on your hard drive in case you decide to reinstall VRC in the same location. All other files remain untouched as well, such as any sector files, alias files, or sound files that you may have added.
[ Print this page ]
|
| © Copyright 2005 Ross Alan Carlson - All Rights Reserved |